From Written to Digital: Creating a Digital Media Assignment Event

photo of computer and a notebook with a cell phoneThe phrase, the times, they are a changin’, never seemed so apropos as it does today. The advent of the internet and its technology quickly changed how we consume and produce content. You might not think that asking your students to create a digital media assignment is in your wheelhouse but there are some benefits to switching assignments up.

Our own, Dr. Mitchell of Communication finds his students are highly motivated by the creative projects. Through these assignments, students are also asked to engage with the campus community. And if students never pursue a degree in communication, he finds that the skills students learn are applicable across all majors. This supplemental reading from the Chronicle of Higher Education also highlights some of the reasons to move towards digital assignments: Let’s Kill the Term Paper.

In the following articles, we cover what our faculty had to say during From Written to Digital: Creating a Digital Media Assignment event on April 4. Our conversation led us to write on four themes. They are

So follow along and learn how to take your written assignments digital.


Images from Pexels , which are copyright free. Those selected do not require attribution. No infringement intended.

From Written to Digital: Faculty Digital Assignments

photo of man working at a computer
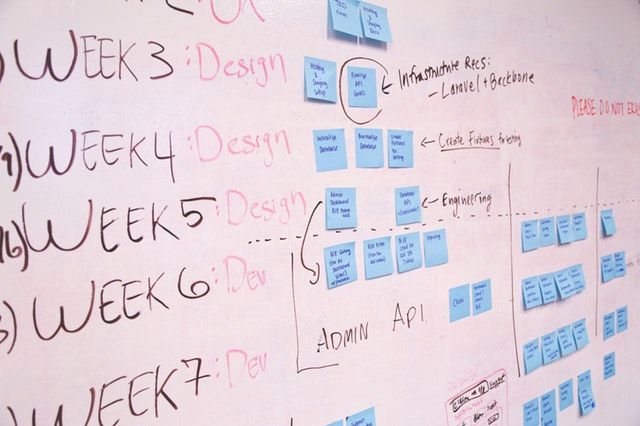
Let’s begin by taking a look at which assignments our faculty members are implementing in their own classes. The assignments represent a variety of instructional techniques, technologies, and end products.

photo of Innes MitchellShort Film
Innes Mitchell, Communication
Group Project, 3-4
Technology: Adobe Premiere

The short film assignment asks students to conduct 4 interviews from their peers in order to create a 4-5 minute video on the topic of feminism. He also requires that students must hand in a script and include voice-over narration. The goal of this assignment is for students to tackle a broad topic, argue their perspective, and reach a decided conclusion about the topic. Essentially students are being asked to find their voice as producers of meaning for a peer audience.

Issue Film
Group Project, 4-5
Technology: Adobe Premiere

Occurring after the short film assignment, Dr. Mitchell merges his groups to form larger ones and assigns a 10-12 minute video project. The intent is that students will focus more heavily on the process of video production: pre-production, production and postproduction. They are also required to interview 6 individuals and arrange a site visit to an organization in the local area. Students must also prepare a 15-minute presentation in which they present their film plan.


Photo of Jena HeathStorytelling with Sound
Jena Heath, Writing
Individual Project
Technology: Adobe Audition, SoundCloud

Here Professor Heath asks her students to create a very short audio, no longer than 2 and a half minutes, news story à la NPR. This brevity challenges her students to keep their stories laser-focused. Students must also interview at least one individual and provide a voice over to help tie together the story. Students are also asked to consider how ambient noise can add atmosphere to their news story.


Photo of Dede GarrisonComposing in 3 Different Genres Project
Professor Dede Garrison, Literature, Writing and Rhetoric
Individual Project
Technology: Adobe Spark

In this assignment, Professor Garrison has her students take pieces of their research paper (which they completed earlier in class) and repurpose it either into a graphic design piece, a website, or video. The intent here is to make students aware of different audiences that might consume their work and how they can tailor their work to serve multiple groups.


Photo of Don UngerCommunity Engagement through ATX Hack for Change
Don Unger, Literature, Writing and Rhetoric
Group Project,
Technologies: Screencast-o-matic

This project requires Dr. Unger to find a compatible community partner to work with his students. He was able to find such a partner though ATX Hack for Change. This project asked his students to create instructional videos for Austin Free-Net. Because branding was especially important, Dr. Unger had his students work on the intro and credits of the videos in class. In-class conversations discussed the aims of the tutorials, how to write instructions, as well as how long the videos should be. In the end, these conversations help students determine what was best for their client’s and audience’s needs.

Now we’ve covered the types of assignments, you might be thinking that this is something you want to actually do. In our next post, we’re going to figure out how to get started.


Images from Pexels , which are copyright free. Those selected do not require attribution. No infringement intended.

From Written to Digital: Getting Started

Board game with a piece on the start spotOur faculty members reflected on how they began incorporating digital media assignments into their curriculum. Although some of them have been doing this type of assignment for several years, they had some advice to offer those who’d like to dip their toes into the digital assignment water.

Start with a small assignment. With this bit of advice, you can begin by keeping the assignment workload manageable. Don’t start with huge projects like thirty-minute documentaries but instead start with finished assignments that last no longer than 5 minutes.

Schedule in-class time to cover the software. Professor Dede Garrison of Literature, Writing, and Rhetoric says to not be fooled by your students’ technical proficiency. Students may be astute at using familiar technology but when it comes to these assignments, it’s wise to schedule some in-class time to cover the software as per Dr. Don Unger’s suggestion.

Utilize the Digital Media Center. You don’t need to have sole expertise in creating digital content because the Digital Media Center has individuals who can help you and your students.  They can assist with forming the assignment as well as coming into your classroom and teaching your students how to create successful digital media projects.

Learn to use the software yourself. That being said, many of our faculty recommend learning to use the software yourself. You can start by using the software for your own projects as Professor Heath of Journalism and Digital Media did. She stresses that this will help provide a frame of reference for your students on how long these projects should be taking.

Look to your faculty colleagues for templates. You may be surprised to find faculty in your department who are already doing these types of assignments. If you ask, you might find someone who is willing to share what they’ve learned with you.

Now that we’ve discussed a bit of how to get started, let’s examine how we can ensure our students’ success with these projects.


Images from Pexels , which are copyright free. Those selected do not require attribution. No infringement intended.

From Written to Digital: Student Success

bunch of fists bumping in a circleThere’s no reason to reinvent the wheel, our faculty have advice on ensuring your students’ success in these projects.

Emphasize time management is crucial to a successful digital project. In terms of creating a video project, for every minute you’re asking your students to create, that represents an hour of editing–and that’s not even including conducting research, recording footage, script writing, etc. So have a discussion with your students emphasizing that the best projects take time.

Discuss accountability and/or assign roles in group projects. The dreaded group project can be an excellent tool for your digital assignment. Students can become responsible for logistics, script writing, recording, and editing. By discussing how these roles should fill out, the more technically savvy can assign themselves in roles where they can be the most useful and let others stay in more familiar roles.

plan on a white boardHave students create a project plan. Having them figure out what they are recording, who they are interviewing, down to what equipment they will need. Not only will this help them create purposeful projects but it will also reinforce the previous point regarding time management. If your students may feel a need to skip this step, have them present as Dr. Mitchell requires for his Issue Film project.

Record audio right the first time. With the progression of technology, it’s often believed that we can fix everything after we record it. And although this might be true to a certain extent, many of us do not have the time nor the expertise to fix it. Although your students may want the ambient noise of Jo’s Coffee, have them record their interview in a quiet location. The students can then add sounds to the audio/video project when they are editing their videos. As Professor Heath stated, “audio can only be edited so much in the end.” The Digital Media Center offers a whisper room for audio recording.

Raise the stakes by making the viewing audience beyond the faculty member. Dr. Mitchell concludes that by having his students share their projects with each other, the quality of the assignment was higher. It made students want to put forth their very best. As a result, students spent more time on task.

Schedule in-class project editing time. In Dr. Unger’s class, this tactic became especially important as all the videos crafted for Austin Free-Net must have the same look and feel. He could then address any concerns while students were in class. If you’re not feeling particularly savvy, you can have someone from the Digital Media Center on hand to assist your class.

And although this is by no means a comprehensive list of how to ensure student success, you can always drop an email to one of our instructional designers to begin a conversation. Otherwise, let’s move on to how do we actually grade these projects.


Images from Pexels, which are copyright free. Those selected do not require attribution. No infringement intended.

From Written to Digital: Managing Grading

You’re probably thinking that it’s all well and good that we receive support in teaching how to use the technology. But what about the grading aspect? Although you may not feel like an expert or even a budding amateur at this very moment, our faculty members share their experiences to help quell any misgivings you have.

You already know how to grade the content component of a digital media assignment. Is the argument sound? Did the student support their argument with reliable sources? Was a thesis clearly stated? These types of questions should already be familiar to you and will make grading the content a breeze. But what about the technical aspect of the video?

Try learning to use the software with your own projects. Both Professor Heath and Mitchell had the same piece of advice to share. If you recall, this was also a piece of advice in our getting started section. That’s because this can inform so much of what you’re asking your students to produce in their digital media assignments. In grading, it can shed light on what’s possible and not possible.

Ask fellow faculty colleagues for rubrics. Perhaps the most useful piece of advice is that you don’t have to start from scratch. Looking over different rubrics can help you hone in on the areas you want to focus on grading. Here Professors Heath, Mitchell, and Unger have graciously granted us the ability to share their rubrics with you.

  • 1. Introduction/story hook (What is the hook for the story? (25 Points)

    • Does your voice-over contain a hook in the first fifteen seconds?

    2. Script audio/voice-over: (25 Points)

    • Is the interviewee properly identified?
    • Does the voice-over script allow you to build to your main point?
    • Does the voice-over script provide adequate transitions?
    • Does the voice-over script reflect research and knowledge of the subject area?
    • Are you able to leverage operative words —the who, what, when, where, how?
    • Did you upload the script to the blog w/the SoundCloud link?

    3. Audio levels and pacing (25 Points)

    • Are the audio levels consistent?
    • Do you as the interviewer allow space for responses — no talking over your interviewer?

    4. The Edit (25 Points)

    • Does the edited final audio story meet the minimum length requirements?
    • Does it tie the voice-over and interview audio together in a package?
    • Is the audio quality clear? Is the volume level acceptable — not too low or too high?

    Total: /100
  • Credits – 20 points

    • Includes opening credits with title that fits with instructional video series (formatting, naming, etc.)
    • Includes main title image and music
    • Includes closing titles that are formatted correctly and contain accurate information

    Instructions – 40 points

    • Introduction sets up video as part of series and addresses video contents>/li>
    • Body provides step by step instructions without inundating user with extraneous information
    • Conclusion points toward troubleshooting resources and next video in series

    Screencast – 40 points

    • Corresponds to steps in instructions
    • No lengthy pauses or sound flubs
    • Narration is well-paced and clear

    Total: /100 points
  • Content Introduction – 10%

    • Film introduced creatively with examples

    Content – 40%

    • Good variety of interviewees
    • Narration clear and designed to help audience understand issue(s) & perspectives expressed
    • Perspectives expressed creatively illustrated

    Content Conclusion – 15%

    • Narration clearly articulates group perspective and/or summary of points of view expressed

    Form/Editing – 20%

    • Film clearly organized/structured
    • Precise and smooth editing and transitions
    • Editing well-paced and designed to tell a story
    • Sound edits clean and levels balanced throughout film

    Timing – 15%

    • Film length requirement (5-6 minutes) met
    • Film link sent to Instructor prior to class of showing

    Total: /100
  • Your Name: ______________
    Group: __________________

    Rate each member of your group in the following areas related to their group participation. Use a separate sheet for each member of your group. Circle the appropriate number to indicate your rating for each area. Then, total the ratings, divide by 3, and multiply by 10 to get a total score on a 100 point scale.

    Note: This form is between you and your instructor. Your group members will not see this form. They will only receive their average participation score. Using “across-the-board” grades for group members will result in a 50% deduction from your Peer Critique points.

    Group Member's Name: _______
    Total Points: _______________

    Task Functions:

    On a scale of 1-10, rate: how effective was the group member in performing their duties and responsibilities as required?

    Comments:


    Social Maintenance Function:

    On a scale of 1-10, rate: How effective was the group member in contributing to a positive socio-emotional climate? (e.g. showed concern for others’ ideas, openly shared ideas with the group…)

    Comments:


    Group Process:

    On a scale of 1-10, rate: How effective was the group member in contributing to the smooth functioning of the group? (e.g. attendance at meetings, promptness, accepting leadership and/or other functional group roles.)

    Comments:

And that concludes our event writeup, From Written to Digital. Be sure to look out for new events where we discuss digital pedagogy.


Images from Pexels, which are copyright free. Those selected do not require attribution. No infringement intended.

Integrating Digital Material from the Library into your Course

8137660881_846c3012f6_qInspired by this Friday’s presentation “Killing the Course Pack: New Methods for Providing Access to Course Readings” co-sponsored by The Center for Teaching Excellence, Instructional Technology and the Munday Library, we wanted to share some information to assist you in integrating digital supplemental course material (and course reserves) into your Canvas or Blackboard course. Photo Credit: Mariusz Kluzniak’s Lincoln’s Inn Library. Continue reading

Enable Student Creative Work with Digital Scholarship Projects

Class blog for Contemporary World Issues, taught by Chris Micklethwait

Class blog for Contemporary World Issues, taught by Chris Micklethwait

We invite all faculty to join your colleagues for a tech snack on how to engage students with digital scholarship projects on Wednesday, November 5 from 3:30 – 4:30 in Library 141.  This tech snack will feature three innovation fellows discussing a variety of digital projects: Continue reading

Trends in Academic Publishing Round Table, Thurs., Oct. 16, 3:30 to 5 PM, Fleck Hall 314

Open Access LogoThe Internet, digital tools, and digital methodologies have drastically transformed scholarly communication.  This Thursday the Munday library is sponsoring a round table discussion that considers these transformations specifically in the area of academic publishing.  Here is the official announcement:

You are invited to a Round Table discussion on the state of academic publishing. If you ever wondered how books are sold, library collections are built, and how new modes of information dissemination affect your scholarship, please join us in this discussion. The panelists will be Sara Hills, Collection Development Librarian, John McLeod, Assistant Director UT Press, and Gary Morris, Dean of the School of Natural Sciences. Pongracz Sennyey, Library Director, will moderate the panel on Thursday October 16, 3:30 to 5 PM in Fleck Hall 314.


Learn about Local Archives for Student Research, Sunday, October 19, 2-6 pm

Interior of old St. Elizabeth of Hungary Church, Alice, TX, June, 1936; photographer unknown. Courtesy of Catholic Archives of Texas

Interior of old St. Elizabeth of Hungary Church, Alice, TX, June, 1936; photographer unknown. Courtesy of Catholic Archives of Texas

One of the greatest resources for students doing research at St. Edward’s University is Austin itself—its community, environment, and history.  This coming Sunday twenty Central Texas archives will be showing off their amazing collections in one big room.  These archives are perfect sources for students looking to research local history or issues.  Such archives provide opportunities for students to do their own authentic research rather than just reading about the research of others.  So if you are looking for ideas for future student research projects, check out the Austin Archives Bazaar, Sunday, October 19th from 2-6 p.m. at the Spiderhouse Ballroom near 29th Street and Guadalupe in Central Austin.  The event is free and features Continue reading