This blog site is run on the WordPress platform and gives St. Edward’s faculty and students the ability to create WordPress blogs for a class or as a personal site or portfolio. Here are some basic steps to getting started with Edublogs.
Starting a blog
Starting a blog with Edublogs is simple. On the St. Edward’s Sites homepage (sites.stedwards.edu), login with your St. Edward’s username and password. A blog is automatically created for you when you log in.
You will first be taken to your profile page, where you can set general preferences and edit your personal information. Once you have viewed and edited this page, you can begin customizing your site.
Selecting a blog
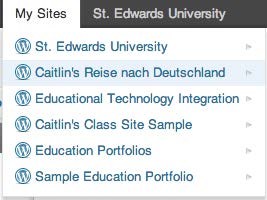
Sometimes you will use multiple Edublogs sites at once. For instance, you may have several courses which use different class blogs in addition to your personal blog. To select a blog, go to “My Sites” in the top left corner of your screen. Next, select the appropriate class or personal blog. Note that these blogs are separate, so if you need to use a specific one for a class, make sure you select the right one.
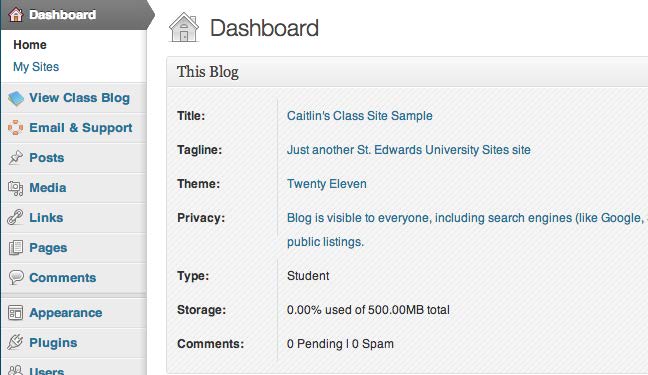
Select “Dashboard” to edit the site. “Visit Site” will take you to the site homepage to show you what your published blog looks like.
The Dashboard
The Dashboard is your main management page for customizing all of your settings. For example, you can create or delete a post, change your blog appearance, or create a new page. For a new blog, a good place to start is to edit your general settings.
General Settings
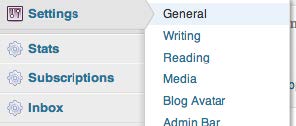
From the Dashboard, on the left-hand menu, select “Settings” and then “General Settings.”
Here you can change your sites title, subtitle, and tagline. You can also change other settings such as the time zone, time format, and language.
Changing Your Blog’s Appearance
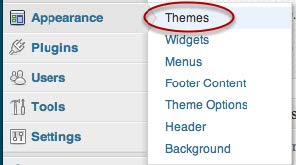
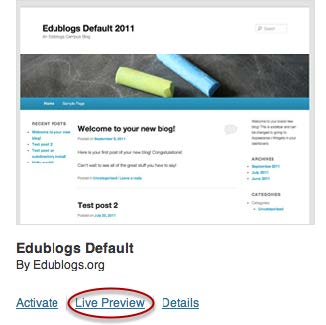
To change your blog’s appearance with a new theme, locate the “Appearance” button on the left side of your screen and select “Themes” from the menu.
Here you can select a new theme for your blog. To see what your theme looks like before publishing it, click “Live Preview.”
Creating and Deleting Posts
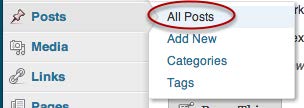
To create, edit, or delete a post, go to the “Posts” button on the menu on the left side of your screen and select “All Posts.”
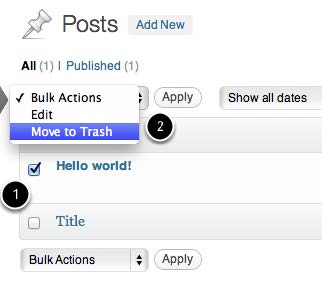
You will first want to delete the default post. To delete the post, first select it. Then, under “Bulk Actions,” located both above and below the post, select “Move to Trash.”
When you’re ready, you can create your own post. Click the “Add New” button to the right “Posts” to create a new post.
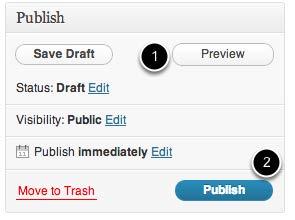
Once you have written your post and given it a title, you can choose to preview it or publish it. If you are not yet finished, you may choose to save it as a draft for later.
To view the post you have created, click “Visit Site” under your site menu in the top left corner of your screen.


