How To Use Your Table Saw
As I have mentioned before in a previous post about the top tools that a beginner woodworker should start with, The table saw is probably the cornerstone of your tool collection.
The table saw, at its essence, is a circular saw that has been mounted under a table surface, with a part of the blade protruding above the table, where it is exposed and able to cut wood.
Although very simple in nature, a table saw offers countless uses for woodworking, and also provides a large amount of convenience and consistency. It is the exact opposite of freehand cutting in every way.
When used in the proper way, a table saw can be counted on to ensure exacting accuracy on a number of different cuts, no matter how many work pieces you have lined up that need cutting. When milling and assembling projects, accuracy is key.
Anatomy of a Basic Table Saw

Table – This is where the table saw gets its name. Most of the operational features of the saw are located here.
Saw – This is a circular saw mounted on an arbor that gives it the proper angle and placement while keeping the saw completely firm and steady.
Blade plate – The blade plate is the area around the slot where the saw blade rises up and above the table.
Blade cover – The cover protects both the blade and the user when cuts are being made. It fits over the saw blade and is curved to match the saw blade’s shape.
Anti kickback – THIS IS A LARGE SAFETY CONCERN FOR THOSE USING TABLE SAWS. When a piece of wood is not secured properly, or fed incorrectly into the saw blade, the forward motion of the saw blade can catch the work piece and hurl it outward – sometimes in the direction of the user at an incredible speed:
Anti-kickback claws are mounted on the rear side of the blade cover and look like spiked claws that angle down and rest on the work piece. As the piece is fed through the saw, the anti-kickback claws act like little tiny hold downs that gently keep the work piece in place.
Rip fence – The rip fence is used to help guide pieces when making rip cuts. The fence runs parallel to the blade and can be adjusted to the left and right, letting the user rest the work piece exactly where it needs to be as it’s cut by the blade.
Miter gauge – The miter gauge is used on the saw table in conjunction with miter slots to run work pieces at specific angles through the saw blade. the miter gauge can be set from 0 – 90 degrees.
Bevel angle gauge – Most table saws are capable of cutting beveled angles, from 0 to 90 degrees. the bevel gauge rotates the saw blade to the desired angle via controls usually positioned facing the operator of the table saw.
Blade height adjustment – Similar to the bevel adjustment, the control is usually located on the front of the saw facing the operator. This adjustment allows the saw blade to be raised or lowered to facilitate cutting different heights of material.
So how do I use my table saw?
CAREFULLY! Just kidding (but not really). This is an incredible tool to have in your inventory. As I stated, it is an excellent tool for making quick, precise work of repetitive cutting tasks. That being the case, you do need to be cautious and very aware when using this powerful tool.
Always remember – safety first!
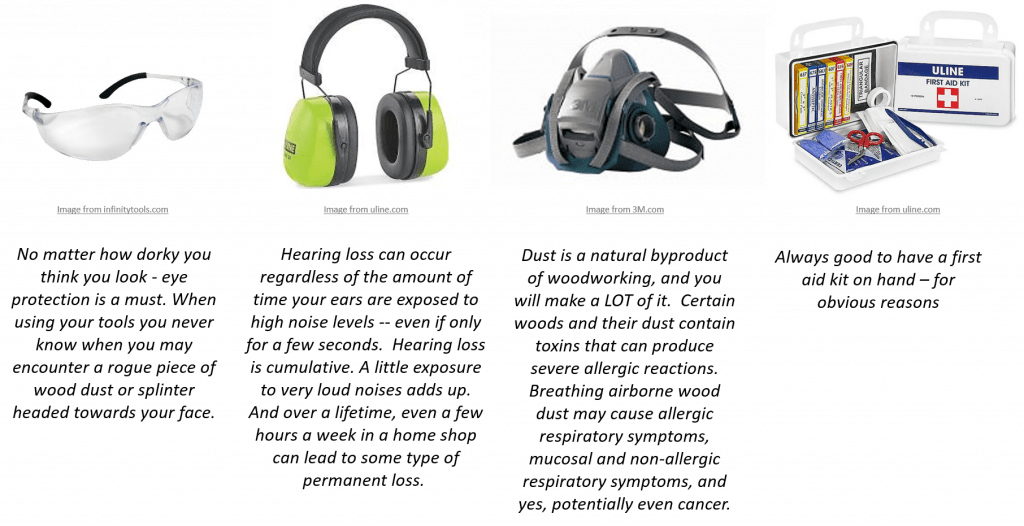
Wear hearing, eye and respiratory protection. Your sending a piece of wood through a device spinning at 3 to 4,000 rpm (that’s roughly 123 mph). Saw dust will happen, as well as the potential for flying wood chips. Lets not forget the noise level: 100 decibels (sounds above 85 decibels are considered harmful).
Check the operation of the saw before you use it – Make sure all the moving piece of the saw move freely. Make sure the blade can easily raise and lower. Make sure the fence moves easily. Make sure the anti-kickback claws are in place and working. Make sure your insert is in and secured properly. Know your equipment and check it prior to use!
Never start the saw while the material you’re cutting is touching the blade. Bad things happen when you don’t follow this rule.
Always use the rip fence when making “rip” cuts. This keeps your material straight and doesn’t allow it to wander on the table, potentially causing kick back from the blade.
Always use the miter gauge, not the rip fence, for crosscuts (the rip fence doesn’t offer adequate support). Again, this is to prevent bad feedback or kickback from the work piece.
Keep material completely flat against the table during the cut.
Cutting blade height – I usually keep my blade about 1/4 of an inch higher than the material that i am cutting. I do this so i can visibly see the action of the blade and it helps to ease chip removal for the blade as well as reduces blade friction.
Have and use push sticks – A lot of artists sacrifice for their work – but this usually doesn’t mean their fingers. Push sticks are devices that are either made, or purchased (some sometimes come with the purchase of a new saw) that are used to feed material through the blade of the table saw:
Making Cuts
Using various jigs, clamps, and stops, woodworkers can make a variety of different types of special cuts like dado cuts, compound angles, and rabbet joints. Even though woodworkers can make these types of cuts on their table saws, woodworkers most commonly use the saw to make two basic cuts:
Ripping, the most common use of a table saw, involves cutting material to a specific width.
Crosscutting applies to cutting material to a specific length.
Below, I have provided links to two YouTube videos that provide step-by-step directions for using a table saw to make each of these common cuts.
Rip Cuts:
Cross cuts:
Some items to note:
When making your cuts, be sure to pass the work piece all the way through the saw blade. if the wast material is large enough to move out of the way by hand, do so carefully, otherwise, wait to remove it until after you have shut off your saw.
For larger pieces, use an out-feed table. An out-feed table is an empty table top exactly the same height as your table saw. it it placed on the opposite side of the saw away from the operator, in the direction the cut pieces of material are going.
Ripping larger pieces can be tricky due to pieces being longer than the table saw itself. often times this temps the operator to reach over the spinning blade to catch the material before it falls. THIS IS BAD AND UNSAFE.
In order to cut longer or larger pieces safely, you must support the end of the board as it comes off the back of the saw.
This is where an out-feed table comes in. These can be purchased in stores and online, along with out feed rollers and other devices to support this “out-feed” lumber. from my perspective, a better solution is to build a small table that’s the same height as your table saw. Or if room permits, build a permanent out-feed platform. Just make sure to support the lumber behind the saw so you’re not tempted to reach over the blade to catch it.
Hopefully this has provided you a good start to using your table saw safely. Just remember to always be purposeful and aware when using your tools.
If you like this post, please consider signing up and getting notified when new posts are available. In the mean time, go make something!


